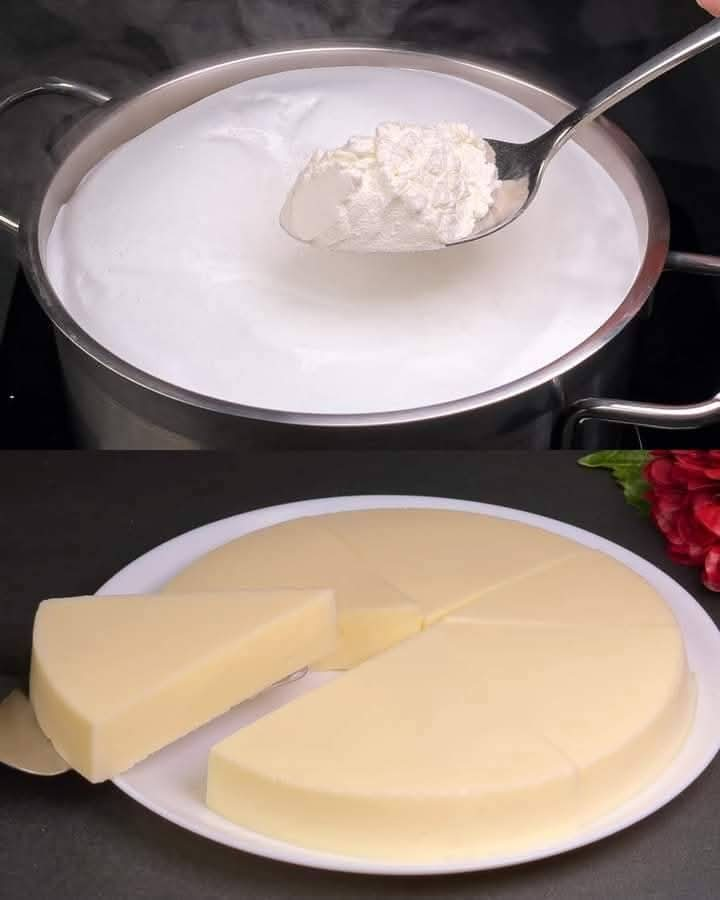
How to Make Fresh Cheese in Just 5 Minutes with 1 Liter of Milk: Quick and Easy Recipe
Are you tired of buying expensive cheese and want to try making your own at home? What if I told you that with just 1 liter of milk, you can make fresh cheese in less than 5 minutes? Yes, you heard that right! You can enjoy a creamy, delicious, and homemade cheese with simple ingredients and minimal effort. This step-by-step guide will show you how to create fresh cheese at home, whether you’re a beginner or an experienced cook.
Ingredients:
1 liter (4 cups) of whole milk (the fresher, the better!)
2 tablespoons of lemon juice (or white vinegar as an alternative)
1/2 teaspoon of salt
10g butter (optional, for extra creaminess)
Herbs or spices (optional, for added flavor and customization)
Step-by-Step Instructions for Making Fresh Cheese:
- Gather Your Ingredients and Tools
Before you start, make sure you have all the ingredients and the necessary tools. You will need a large saucepan, a stirring spoon, a strainer or cheesecloth, and a bowl to collect the cheese.
- Heat the Milk
Pour the whole milk into the saucepan and place it over medium heat. Stir occasionally to prevent the milk from sticking to the bottom of the pan. Heat the milk until it reaches a gentle simmer, but do not let it boil. You’ll notice small bubbles forming around the edges.
- Add the Acid (Lemon Juice or Vinegar)
Once the milk is hot, add the 2 tablespoons of lemon juice (or white vinegar) into the milk. Stir gently to combine. You’ll notice the milk starting to curdle almost immediately. The acid will help separate the curds (solid) from the whey (liquid), forming fresh cheese.
- Add Salt and Butter (Optional)
After the milk has curdled, add 1/2 teaspoon of salt to the mixture for seasoning. If you want a creamier texture, you can also add 10 grams of butter at this stage. Stir until the butter is fully melted and incorporated into the curds.
- Let It Sit
Let the curdled mixture sit for about 1-2 minutes. This allows the curds to firm up and separate more easily from the whey.
- Strain the Curds and Whey
Place a strainer or cheesecloth over a large bowl to catch the whey. Carefully pour the curdled milk into the strainer, allowing the whey to drain out. If you prefer a drier cheese, let it drain for a longer period. You can save the whey for smoothies, soups, or baking—it’s packed with nutrients!
- Optional: Add Herbs or Spices
For added flavor, you can mix in your favorite herbs or spices into the curds. Chopped parsley, garlic powder, or a pinch of black pepper can give your homemade cheese a unique taste. Be creative and experiment with flavors that suit your palate.
- Shape and Enjoy
Once the curds are well-drained, you can either leave the cheese as is or shape it into a small round or block. The cheese is ready to eat right away! If you prefer a firmer texture, let the cheese cool down in the fridge for an hour or so.
Why You Should Make Your Own Cheese: Making your own fresh cheese at home has many advantages. Not only is it a fun and satisfying cooking project, but it’s also cost-effective. Store-bought cheese can be expensive, and often contains preservatives and artificial ingredients. By making cheese at home, you have complete control over the ingredients and can adjust the flavor to your liking.
Health Benefits of Homemade Cheese:
- Rich in Protein: Cheese is a great source of protein, essential for muscle growth and repair.
- Full of Calcium: The calcium in cheese helps build strong bones and teeth.
- Customization: You can choose to add or avoid ingredients according to your dietary needs (e.g., lactose-free options, low-salt versions).
Common Mistakes to Avoid When Making Fresh Cheese:
Using Low-Fat Milk: Whole milk is best for making fresh cheese, as it contains the right amount of fat to give the cheese a creamy texture. Low-fat or skim milk may result in dry or rubbery cheese.
Not Heating Milk to the Right Temperature: Make sure the milk is hot enough to curdle but not boiling. Boiling milk will ruin the texture and may cause it to burn.
Adding Too Much Acid: Be sure to measure your lemon juice or vinegar carefully. Too much acid can result in overly sour cheese, and too little will prevent the curds from forming properly.
Creative Ways to Use Your Homemade Cheese:
Spread on Toast: Use your fresh cheese as a spread for toast or crackers. Add some herbs or spices for extra flavor.
Add to Salads: Crumble your homemade cheese on top of salads for a creamy, rich addition.
Make Cheese Stuffed Pasta: Use your fresh cheese as a filling for ravioli or tortellini.
In Sandwiches: Fresh cheese is a great addition to sandwiches, offering a creamy texture that complements fresh veggies.
Final Thoughts
Making fresh cheese from 1 liter of milk in just 5 minutes is a fun and rewarding activity that anyone can try. Whether you’re looking to save money, avoid preservatives, or experiment with different flavors, this simple cheese-making process is a great way to start. Plus, it only takes a few basic ingredients to create a product that’s rich in taste and texture. So, next time you need cheese, skip the store-bought kind and make it yourself! Enjoy your homemade cheese, and feel free to experiment with flavors that excite you.
